
Indeed, finally, getting closer to finishing the floor and a big check mark off my to-do list.
Despite my teases I'm sure you accurately guessed because you're all very smart people: I made sawdust grout. You can find information on how to do it online, but I must say it's an intuitive thing. Mix a binder (polyurethane, glue, sticky stuff) with a medium (sawdust) and voila, you have a "grout."
So here are my supplies:
- Minwax High Build Polyurethane, semi-gloss
- Mineral spirits
- paint bucket
- plastic putty knife
- mess of paint sticks
- sawdust
- rubber gloves
- my trusty can of Coke in a Menards coozie

Oh, and tissues. My constant companion as of late, tissues.
That other thing in the box is what I'll use to apply the polyurethane to the floor. Did not realize the poly had a pronounced brown tint to it, by the way. I blame the song playing at Menards while I was in that aisle, causing my eyes to well up. I may exchange gallon number two tomorrow.
Don't fret if you don't have a great woodworking friend like my friend Scott with lots of sawdust. I incidentally came across an ad on Craigslist in the free section from someone giving away bags of the stuff. Or, search for woodworkers in your area, contact them, see if they have any they are willing to give away. I'm sure they'd appreciate knowing their sawdust went to good use rather than the garbage bin.
I have to say, man, it was a pain in the rear end, the grouting process. Ok, tedious. Labor intensive, shall we say. It's not that it was hard; it was easy but very painstaking and slow going and it required a plethora of patience. If all of the wood pieces and gaps had been uniform, that would have made it easier for sure, but they weren't, so....
Because I was worried I'd run out of Scott's sawdust, I had picked up some from the Craigslist ad and I knew right when I saw it that it was not what I wanted. In my compromised state, I didn't want to be rude so I bagged some up, graciously said thank you. Scott's dust is very fine; this other sawdust was from a planer so not really dust per se, more like shavings. That didn't work out so well, the shavings, and in fact they were rather frustrating.
 |
| This is solely Scott's sawdust, not the other stuff. |
 |
| Both types of sawdust here. Mmm, granola anyone? |

As you can see, not great results. Don't be like me and mix a big vat thinking it's going to work straight away; mix a small amount and test it first. Right, so back outside I trundled for more mineral spirits and poly.

This mix was still not working for the smaller gaps due to the large shavings type of "dust" so I resigned to use this bucket's-worth on the larger gaps and it was fine enough. I was able to use it up and not waste it.

Batch two was better using a lot of analysis, thought, trial and error, solely Scott's fine dust, and more liquids. It was certainly a learn as you go, jump on in kind of day as I'm sure you're gathering.
After a lot of mushing and squishing and cramming and scraping and sculpting with the mixing stick, putty knife and my (gloved) fingers (yes I had to mention gloved fingers as I might ordinarily do this not intelligently sans gloves, but since it's oil based, I gave in to the gloves), I was finally getting some results. Big learning curve.

Patience is a virtue, I kept telling myself. You already understood patience, but thank you Hailey for teaching me more about selfless patience (in a good way).

I realized due to the variations of the gaps that I'll have to rely on and make my polyurethane do a bigger workout when I go to seal everything up. It'll be fine though. I realized too that I need to think of this floor as more like art, an art installation, where the imperfections make the work.

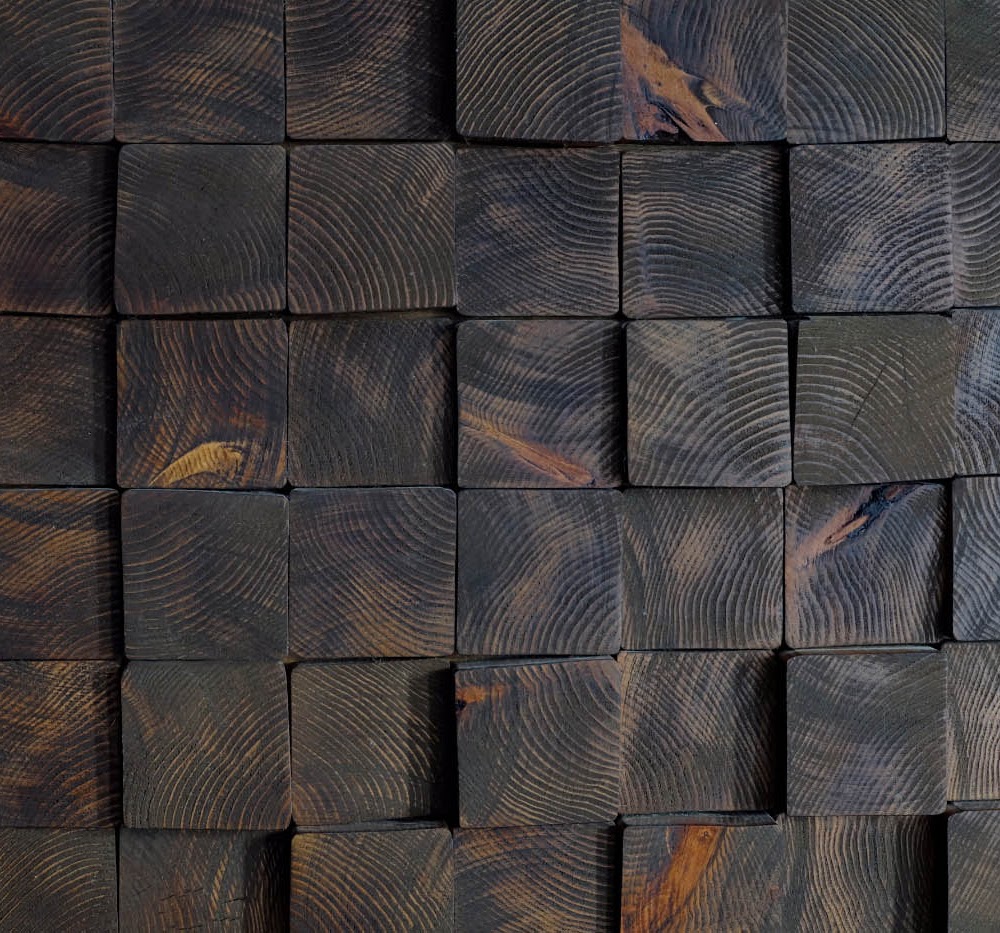
After a long day, five hours+ to be approximately exact, I finally got it grouted. It's hard to see in the photos (I didn't want to get my crusty sawdust/poly covered fingers despite the gloves all over my nice camera) but it's pretty messy. It was a fine line between scraping up the excess so as to minimize sanding/clean up and scraping out what I had just struggled to get in there.

Right now, it just looks like the floor is wet-ish with lots of chunkies on it. I really hope I don't have to sand too much, which I'll do by hand to protect the patina of the wood, but we'll see, huh?

Some friendly tips:
- constantly stir the mix as the sawdust settles quickly
- wear a respirator if you have one; run a fan and open windows otherwise
- wear yucky clothes as you will get gooey crunchy
- it doesn't behave like real grout or like patching a wall
- work in small sections or areas at a time, especially if you use poly as it will absorb fast
- oh and be patient
So I'll see tomorrow how this all panned out. It sure is smelly in here.
I just wanted to say thank you to those who sent messages or commented after yesterday's post. It was genuinely difficult to write after everything that has happened (Mike read it and the first thing he said to me was, "how did you do that?"). Every day, every hour, is arduous for us right now to say the very least, so to hear you all care and support us and are thinking of us and continue to read along means quite a lot. Thank you.
I am dedicating this blog in its entirety to Hailey as if it hadn't been for her, we would not be in this house. It is uncomfortable to call this a "home" without her.


Becky,
ReplyDeleteI am sure Hailey is beaming with pride!
Karen Marie
Dragonfly & Lily Pads
I hope so, thank you.
ReplyDelete