
She's been reading along here and when the PR team at Wiremold by Legrand asked if she knew anybody who could test out and review their In-Wall Cord & Cable Power Kit,* she asked me.

Holy thrilled was I! A chance to do something for Janette and as a bonus, that ugly zoo of cables on our wall was going to disappear? Nice. I am unquestionably anti-visual clutter so this was perfect.
 |
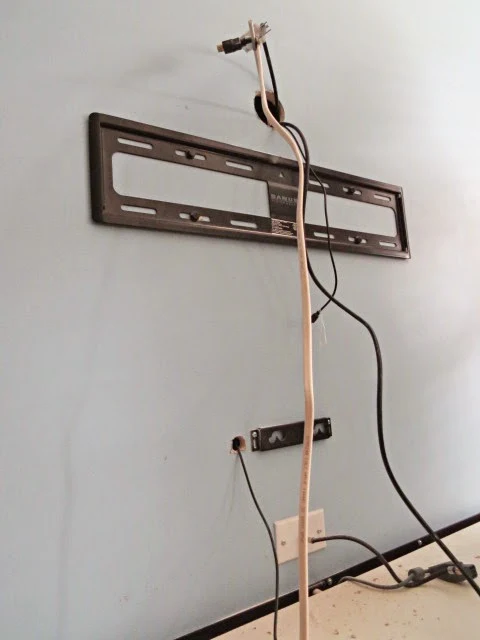
| The before. |
The idea behind this kit, she said, is that it is meant to make the process of hiding the cables easy, that anyone can do it regardless of skill level especially because the kit contains all the tools, pieces, and parts you'll need. Further, there's a spiffy, brief, clear as day video online that shows the process for those who dislike written instructions.
 |
| Don't mind my dusty dining table. Sheesh. |
Shortly after our email exchange, a box arrived with the kit and like a giddy school-kid, I was super excited to get going. Then life stepped in and this got postponed, then postponed again. But finally Mike and I made plans to get this done today. And we did.
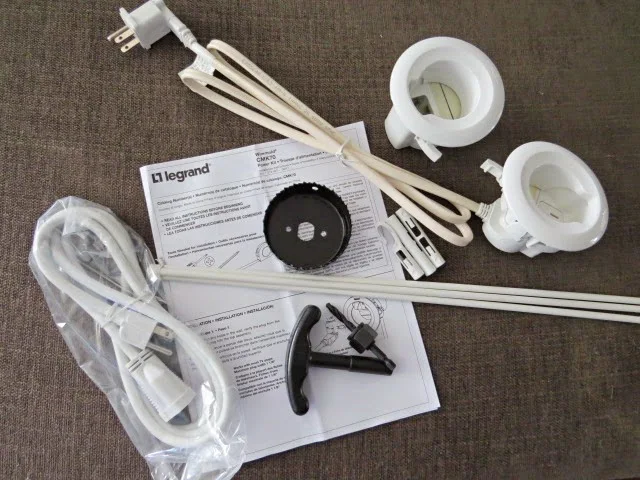
After watching the video together, we unpacked the box. So few ingredients I thought, and it doesn't attach to the wall studs, huh? But, hm. Ok, let's go.

I should have checked the city code beforehand but didn't. You should though, as recommended.
Our gizmo collection includes a Mike addition after the tv originally went up: a soundbar. He also has a game console but there was no issue with that. But also, our cable outlet is above the shelf, the power outlet below. It's, it's a mess. head shake

The kit we received is intended for a simpler arrangement of television, tabletop boxes, and outlet. No worries, it just took us a bit more brain crunching, configuring, finagling, and one extra hole.

The kit we received is intended for a simpler arrangement of television, tabletop boxes, and outlet. No worries, it just took us a bit more brain crunching, configuring, finagling, and one extra hole.

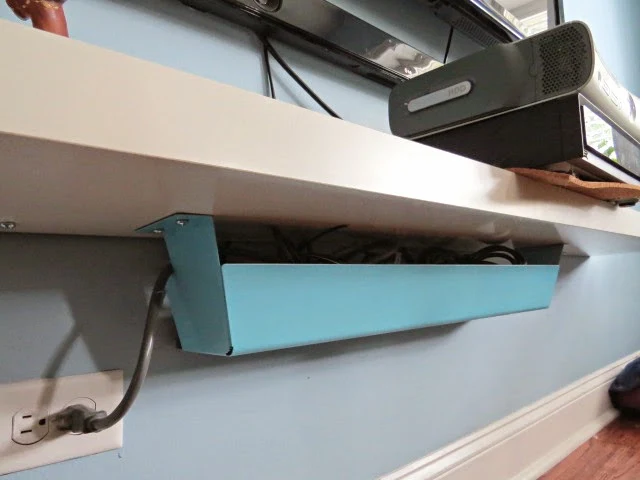
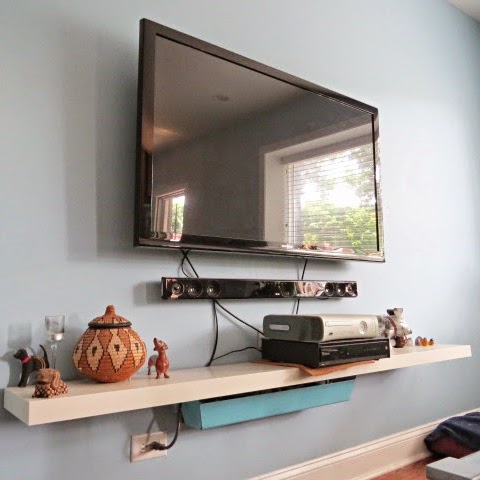
As you can see, I attached an Ikea cable management doohickey to the underside of the Ikea Lack shelf for a power strip, the game console plugin thingie and extra lengths of cables. It's unattractive still despite my spray painting it an unmatching blue and my attempts to minimize the mess, but it does its intended job I guess.
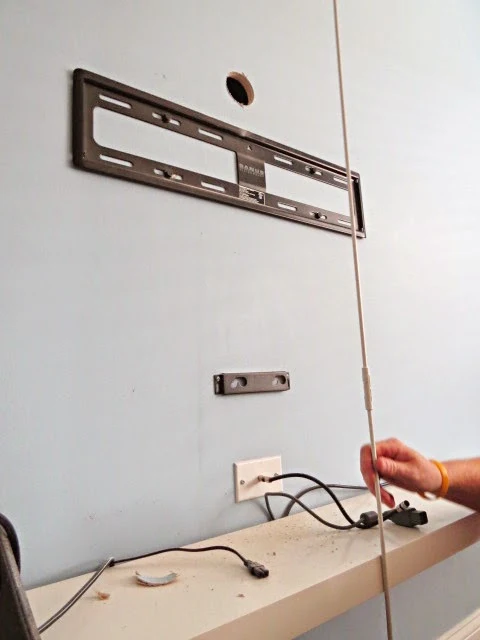
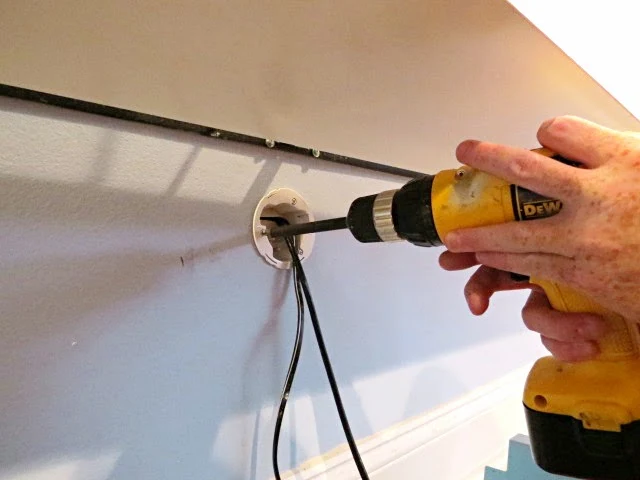
Ok, so we started by assembling the included hole saw and while the guy in the video makes it look easy peasy to turn it by hand on his built stage set, we had to dig out the corded drill.* No problem though - the hole saw made quick and handy work of the two required holes in the wall. After all the holes in the basement bathroom though, I still struggle to make holes anywhere, heh.

We already knew where the wall studs were from hanging the television initially. We didn't measure for the kit part holes as advised in the directions, rather just eyeballed it, but measuring is good if you're feeling unsure.

Next up was fishing the cables and such and the top kit part with the plug into the wall. Here's where our brains hurt thanks to the soundbar and the back of the tv inputs being spread all across instead of logically in one spot. Mike didn't care if the soundbar cables were seen, but since we were going to this effort, I wanted all the cables hidden. What baby wants, baby gets.
So, we drilled an ugly hole behind the soundbar that I need to figure out how to plug up since we found one of the covered over windows and hey, no insulation in the wall. We next fished those cables up and down through the bigger holes. (Update: it is against code and potentially hazardous to run power cords like soundbar bar cord in the wall. Please find a better option such as mounting the sound bar flush to the television and run the power line up behind the tv.) (Or, you can get a kit which states it has parts for the soundbar.*)
Of course our digital optical cable for the sound bar wasn't long enough, right, so we had to dash out and pick up a longer (so overpriced) one.
 |
| I love each and every one of those Mike freckles. |
 |
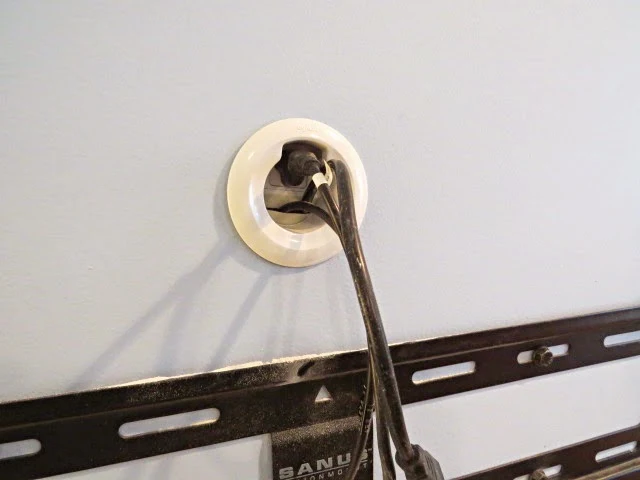
| Inside the top hole. See the window with no glass? See any insulation? Neat! |
The only issue we had with the kit was the plastic fish line.
Right off the bat the hook snapped off without much effort as Mike was attempting to snare the plug on it. Then we had a spot of trouble with it not being a bit more flexible. And then the two pieces disconnected while inside the wall. Nothing duct tape couldn't fix though. Mike felt the pieces should screw together and I thought the pieces could be shorter to save on packaging though that might inhibit bend-ability. Mike said too it was hard to keep the fish line tight to the back side of the drywall, again due to inflexibility-ish-ness, and we realized if someone has insulation in their wall, it might prove tricky to squish things through. But, all in all, we got it to work.

 |
| The hook piece for the fish line, broken off, sad. |
Once we had the longer optical cable, the rest of the process was super speedy. Fish the soundbar cables through, insert the top kit part in the wall, tighten screws to attach, then snap on the faceplate.
A very clever design on the back keeps it tight to the wall - when you tighten the screws, little flaps pivot to work as wall anchors.

A very clever design on the back keeps it tight to the wall - when you tighten the screws, little flaps pivot to work as wall anchors.
After that, attach the plug end to the back of the lower kit part, squish through any other cables you need, place the part in the hole, tighten the screws, and snap on the faceplate.
Plug in the provided power cord, connect and re-place all your components, then kick back on the couch with a cold drink and enjoy your cable-free wall. Sweet, right?

Plug in the provided power cord, connect and re-place all your components, then kick back on the couch with a cold drink and enjoy your cable-free wall. Sweet, right?
 |
| Beautiful!!! Love it. Love love love it. |
Someone really thought through the engineering of the pieces, every step of the process, and how to smartly streamline both the parts and the process. And I was quite impressed. I truly think this is a mighty clever assemblage of a DIY kit, appropriate for anyone to use, and it does the job perfectly. I mean look, no more unsightly cables! None! No cables!! I am thrilled. Truly thrilled. It's easy to use, intelligent, and fast. Thumbs up from us for sure.
While we didn't get it done in the under thirty minutes they claim, it was surprisingly quick. If our set up was simpler, under thirty would have been nearly attainable.
It seems the pricing on the kit varies but regardless of cost, despite my excessively thrifty blood, I would wholeheartedly recommend this kit without hesitation every day of the week.
So thanks Janette and Wiremold by Legrand. You're both awesome!
Update: Several hours later I hear from the other end of the couch, "ya know, it really is nice not to see all those cables." Win!
Disclaimer: While I was not compensated in any way at any point, I did receive the product for no charge. I was thoroughly encouraged to be upfront and honest about the product and our experience. The opinions here are completely my own. And Mike's too. Pinky swear.
And while I was not compensated, here is an affiliate link through Amazon* (one of many places that carry it) to purchase the kit. Best Buy also carries it here.* Thanks!
Too, if you can't go into your wall, here's another affiliate link* (see the "boring stuff" tab for an explanation on affiliate links) for other types of cable management thingies.
To see the updated, vastly improved television console, click here!
*The Legrand Wiremold links are Best Buy affiliate links. Use eBates (that's a referral link -- we each get a cash bonus if you sign up and use it) and get cash back on your purchase! The corded drill and wire kits are a Amazon affiliate links. Mwah, thanks! Please see the "boring stuff" tab for more info.


Do you know that fishing the power cord for the sound bar up through the wall is code violation and fire hazard?
ReplyDeleteThanks. I'll look into addressing this right away.
DeleteCode violation maybe... Fire hazard, probably not...
DeleteYou can get a real metal fishtape at Lowes or Home Depot for about $10 - $12 and the hole can be made with a keyhole saw about $5.00 at Harborfreight. as far as the grommets, that can be done with a variety of parts. You can use an outlet plate made with a large hole, or for a few extra bucks you can get one made for this project with1 slanted grommet or one with a grommet and an AC outlet. All can be bought for less than the eighty bucks and you have some real tools left over.
DeleteTotally true, there are many ways to accomplish this and ways to do it for less. For the amount of time running around town and tracking down parts though, it seems (to me anyway) the same would be spent in gas and time. But definitely, there are many ways to get the project done.
DeleteAs always, entertaining and educational! Keep those blog posts coming….love reading them all from start to finish!
ReplyDeleteDial Tone Phone Services
Hi fellas,
ReplyDeleteThank you so much for this wonderful article really!
If someone want to read more about that cable management products I think this is the right place for you!
You are really good at making something yourself well, or rather creating a plan of how to solve a problem. I also have such a problem with wires behind my television. Thank you a lot for this post.
ReplyDelete