Totally did not mean to skip over this by stuffing in a Variety Pack ahead, I swear. Confluences what they are, ya know, schedules are weird, what can I say. But I am here for you! Indeed, time for the story of finish work on the drawer unit I designed for the kitchen!
As we remember from last time, Heather the woman who also shared a tool rant aligned me with the PureColor folks, environmentally friendly water based finishing products. They were interested in blogging type peeps testing out their cool stains.
Very generous of Heather, and then too, very generous of the nice PureColor folks.
I am to mention here that while I did receive products for free, I was not paid in any way, shape, or form; all of these opinions are mine, allll mine. There will be affiliate links to the stain fyi, just so you don't think I'm scamming you which of course, duh, I would never do.
Back to the story....
To remind, originally the plan was to paint the thing black but Heather hooked me just in time with the whole stain idea. And as it turned out they make a black stain called Ink Blot. Yes, black stain, mmmm.
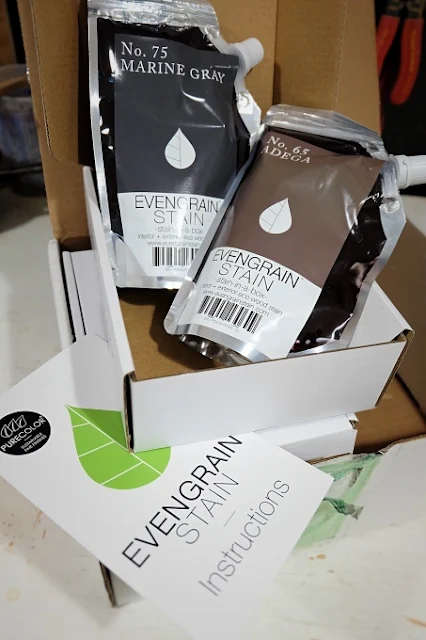
The PureColor folk were terribly kind and not only sent the Ink Blot, they sent two other colors I was pursed-lipped curious over for the cabinet, two extra sample colors, and a quart of their spiffy looking semi-gloss sealer.*
So's ya know, they are pricey stains,* comparatively speaking. But. But. You can easily double a pint into a quart, a quart into two by thinning with water, they are that concentrated. No joke. And yes, thinned with water, making life oh-so-pleasant.
Overall? I liked them. They very much reminded me of fabric dye in a way. I do need to give them further workout to get the full lowdown nitty gritty. I was steely-eyed focused on getting the darn drawers up in the kitchen finally.
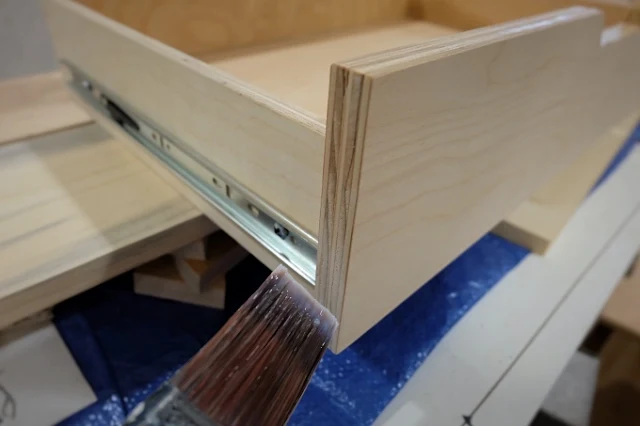
Deciding the drawer insides should be un-stained, I began the finishing process by doing them up with Varathane Heavy Use* sealer in satin. After each coat, well, I only did two, the insides got an ever-so-light sanding.
At the same time, I also sealed the edges so that the stain would not bleed into them as the whole design was based on seeing the untouched end grain edges of the plywood.
And then it was go-time! Time to try out the fancy new goods!
And then it was go-time! Time to try out the fancy new goods!
 |
| Opened a box and two pints of stain within. Cool! |
Eerrtt.....Part of what took me so darn long to get this particular post together was that I was tasked with creating my first ever video and, well, it took me a bit to figure out how and what and stuff and junk. Heh, shrug. So here's part one:
Omg it's Mike! Right?! How fun. He may or may not have been a wee nervous. Heh.
Because I was working on birch plywood, the colors varied from my on-screen website perusal. They show oak and pine on their site.
Marine Gray was more midnight blue than gray. Adega quite purple. But, be acutely aware, as with any stain or paint, colors will vary from not only your screen or paper color chip but on each type of material you use so this was not unexpected.
But, as such, I did go with the Ink Blot as I didn't want the cabinet unit, despite its very different design from the kitchen itself, to be that different. Harmony of eye movement in one color, mm hmm.
A more thorough running through of Ink Blot then took place.
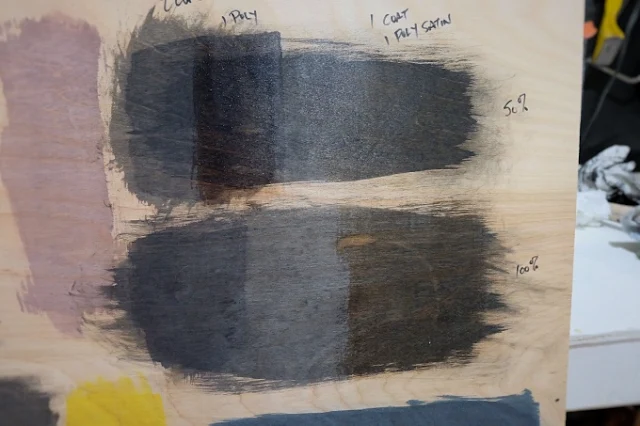
Testy testy testy....Full strength Ink Blot on dry and pre-dampened wood, half and half the same way were my main focus. By pre-dampening I mean I brushed on a light coating of water first, giving it a quick wipe, to prime the surface to see if it would help with application and evening out brush strokes.
 |
| Doh! |
My understanding is that if you can track down a water based wood conditioner, you will be good to go. Anything else, it's a no-go attempt at an oil and water mix.
After everything dried (important, people! Let things dry first!), I opted for a 50/50 water/stain mix on dry wood for the final application.
The stain comes with simple instructions so give those a read through. Key, as with any stain, is working it evenly and their instructions have handy, helpful tips in that regard. After a light drawer surface sanding, I used my favorite synthetic paint brush then gave a schmear-down wipe up after a couple minutes.
 |
| Wet drawer! |
 |
| No, it doesn't look scary here but I think I was expecting the stain to be darker. |
Aw man, decisions decisions! Hair-pulling decisions!!
I tell ya, it's tough designing for yourself, as many many many many people struggle with, hence all the blogs, design magazines, designers for hire, television shows..... The options. Oh the options!, darn freakin' endless.
I hemmed, I hawed, I paced. Brought the board upstairs and propped it next to the existing cabinets. Twice. Hem, haw, pace. Head tilts, pace.
 |
| Hi Finn! |
In the end I went with one coat of stain not two, two coats of sealer. Despite Mike's subtle insistence that I do a second staining. I am quite pleased with the end results, it's quite perfect actually if I do say so myself.
All right, so stain wrap up? Liked 'em.
Liked the pouches they come in, did not like the suggestion to dump any leftovers. I understand their reasoning and too it could be risky trying to dump back in but I'm big into not wasting products if at all possible.
 |
| Painter trick: plastic wrap right on the surface, squish out air bubbles and bingo, saved paint or stain! |
Liked the colors, the variety of online and the different types of colors they manufacture than what one usually finds on the shelf at the store. How many times have I stood in the stain aisle with a glazed expression...........all.the.same.colors. Yawn.
Definitely liked how concentrated they are as, heh, the options on effortless usage is miles longer than a regular stain. Thin not at all, thin a lil' bit, thin a lot -- the achievable effects are only limited by one's imagination.
As I said, I was surprised at the color variance on birch plywood from the oak and pine sample chips online but again, completely different material so I can't be too surprised.
Loved that they didn't smell at all, like no scent. None at all. Heather mentioned they smell like those watercolor kits* we had as kids but I didn't even get that. So the one time someone claims to be scent-free, they actually are. *poof,* mind blown. I know, right?!
Oh and here's video part two!
Poor Mike, how I torture him so. Heh!
After we shot those snazzy videos, I did apply the PureColor semi-gloss sealer to the part Mike stained. That stuff does have more of a scent but please, it's hardly anything worth mentioning it's that innocuous.
Do note that if your usual clean up spot is a white plastic laundry sink tub like mine, yep, the stain stains the tub. Some scrubbing with a cleanser is pulling most of it out though so no need to panic.
The stains dry incredibly quickly which is a major major plus. I was able to stain and seal within a mere two, two and a half hours and be done with entire the project in my slightly humid, cool basement in an afternoon. Done. Yes, kid you not. What a time saver. Done.
So done I was tempted to install the whole shebang on my own but knew Mike had an upcoming day off so I waited with wide-eyed screaming installation anticipation. That and I knew I'd get lectured about overdoing it with a gimpy arm. Mmmm, not big into lectures.
Overall, these stains are quite easy to work with, though I strongly encourage testing them first before going right at it. They are different than you're used to but not terribly so; I had no issues whatsoever.
Overall, these stains are quite easy to work with, though I strongly encourage testing them first before going right at it. They are different than you're used to but not terribly so; I had no issues whatsoever.
Would I buy them? I would definitely give them energetic consideration. What's holding me back? The price point. Yeah. I know, I can thin them and get my money's worth as I mentioned. But that's the only thing that would hang me up.
In the end? Thumbs up. Thanks PureColor folks!
*The PureColor sealer, stains, Varathane, and watercolor kits are all Amazon affiliate links. Mwah, thanks! Please see the "boring stuff" tab for more info.


Your blog is so much fun to read. Thank you for sharing all your great projects!!!
ReplyDeleteThank you so much!!
Delete